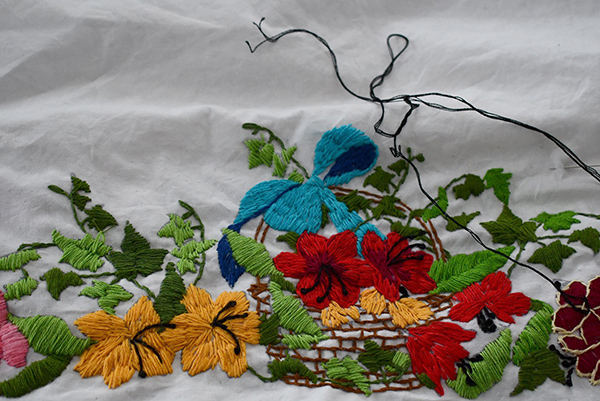
The progress on the flower basket pillowcase with a blue ribbon has been gradual. In my last post about this guy, we had just finished with the majority of the satin stitching on the blossoms. The basket line work and the blue ribbon were also complete. Beginning with the right side and working to the left, the vines and leaves had only just begun.
 Satin Stitch
You can see up close, how the satin stitching is beginning to work together. If you have problems with your hand satin stitching check this site out. It is kind of exciting to see how the satin stitch works, isn’t it? Sometimes, I haven’t done a stitch for a while and I get lost. When that happens, I just look it up on the world-wide-web. It is amazing how many high-quality little lessons are available to learn better techniques.
 Details
Progress is made on this as more detailed work gets done. Gradually, it becomes easier to see flowers as they come to life. The Flower stamens, then outlining begins on the flower petals. I am actually using some really different outlines to see what it would look like. For example, see the maroon blossoms outlined with pale yellow. Hmmm. In all honesty, there are so many shapes in this pattern that it is a little confusing at times. Am I stitching on a leaf or a vine?
 Now, you can see that as more and more of the objects are filled with color it then gets easier to differentiate between a leaf and a vine.
My plan of attack from here will be to complete the work on outlining and details. Little touches here and there will get it to look exactly the way I want it to. Zing! a pillow full of love, to lay your head on and sleep.
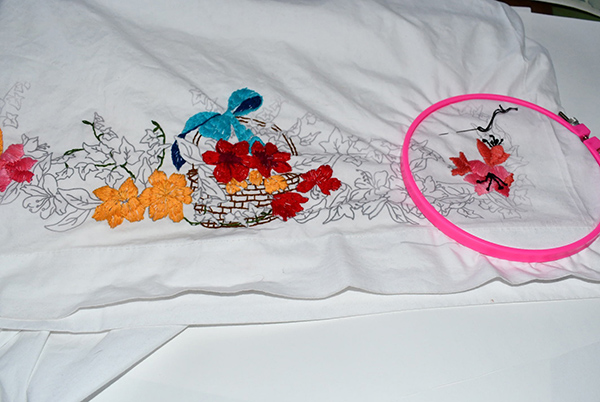 Embroidering a new pillow case in the evenings. It is a “Flower Basket” pattern from one of my many iron-on patterns purchased over the years from (
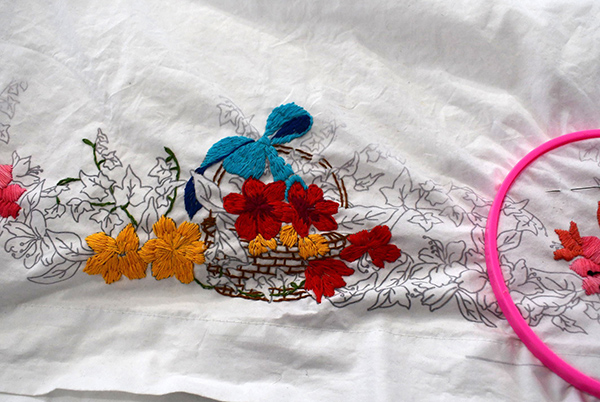 Really, I don’t know what kind of flower is portrayed in this design. Not taking the time to research it, I am using any color that I feel like for the flowers. If you do know what kind of flower this is, please let me know. In the flower petals, there will be lots and lots of satin stitches happening.
 Now, you can see some of the gold flowers have the
 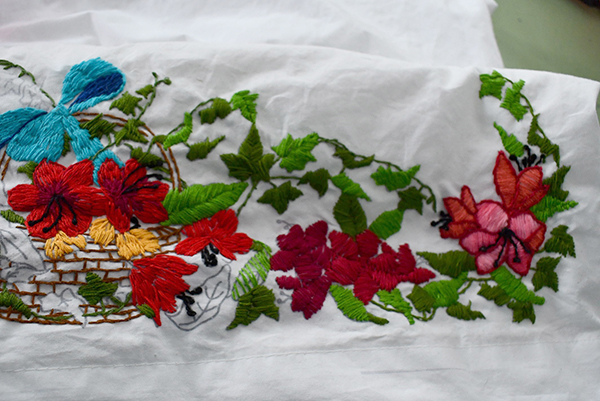 I am using all kinds of different greens on the leaves and vines and a good mixture of reds, yellows, and pinks on all the flowers. This is the most enjoyable way for me to paint with thread, just do whatever I feel like. How about pink? Nah, Yellow-orange, yeah that fits right here.
 You can see that the ribbon is one of my favorite blues, I have a lot of shirts in this color. We all know it takes some time to finish one of these pillowcases. But, embroidery is a lot of fun for my hands in the evening. A repetitious movement calms me as I take one stitch after the other. I almost can feel the presence of my Mom, Grandma, and Great Grandma in the room sometimes. We enjoyed sitting in the living room doing our crafts together and visiting as we listened to music.
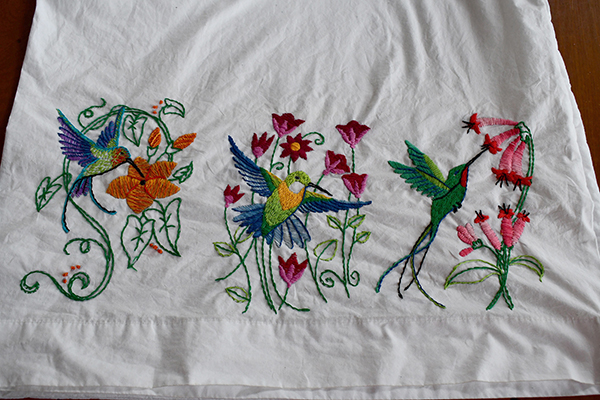 Here are the gradual steps that are taken to finish this pillowcase with 3 hummingbird iron-on patterns. Three different arrangements of birds, flowers, and foliage across this single bed linen.
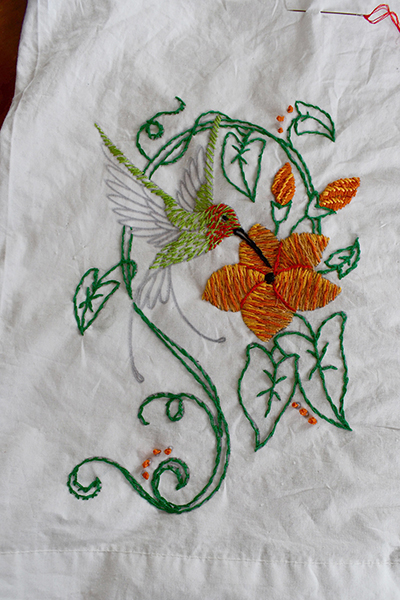
 Black lines emphasize the underside of his body shape, his beak and eye, and the individual feathers. Then turquoise blue is used to outline his upper body shape and wing tops.
 This hummingbird flying toward us is showing his underside to us with flowers behind. His wings and tail feathers begin in blue stitching.
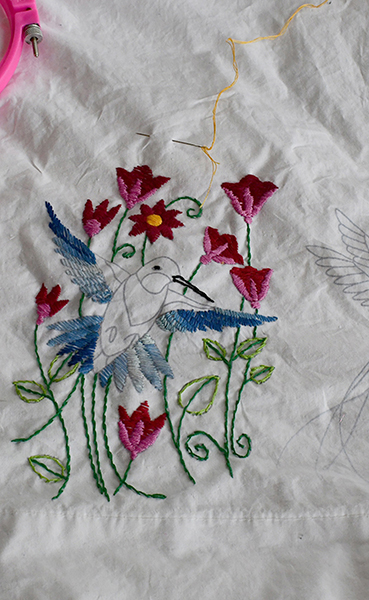 He is satin stitched in greens on his body and the wing tops along with a light amount of yellow highlight. His chest is a brilliant yellow and the underside of his throat is left white. Dark royal blue is used to outline the feathers on his outstretched wings.
 This pillow has 3 hummers (hummingbirds) on it from
 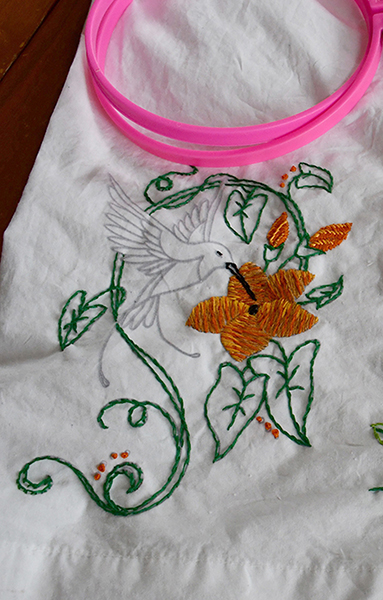 Close up of a humming flying toward us showing his underside is in the middle with some maroon and purple/pink petal flowers in the background. I have only started to stitch the underside of this bird’s wings and tail feathers in blues.
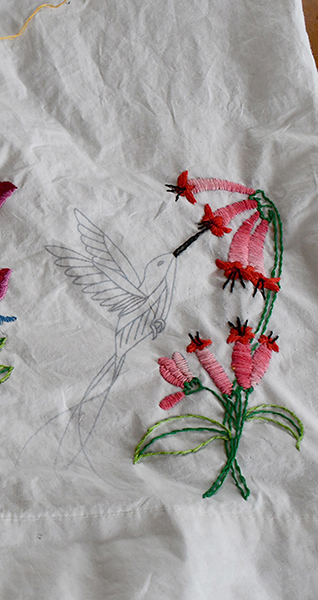
 Just finished embroidering a white Pillowcase Two H Birds. Usually, I draw my own pattern but these two hummingbirds are from an iron-on pattern by
 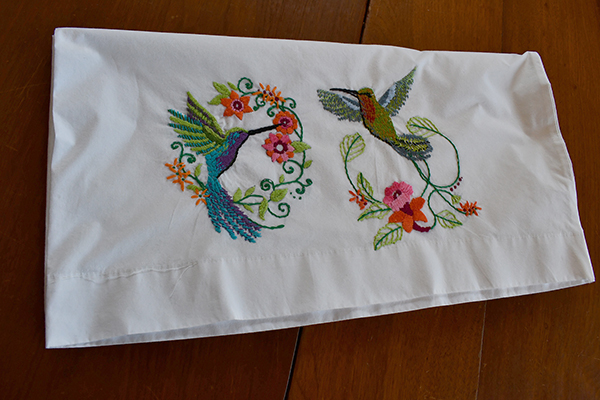 Here is the pillowcase all washed, ironed, and folded on the dining room table. I really took the easy way out on this, with the pattern and also failing to take pictures as the project gradually progressed. You’ll have to use your imagination.
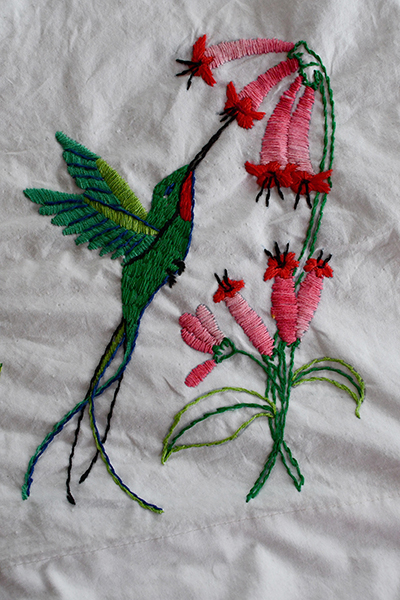
 This hummer on the left side has his beak inserted into the middle flower on the vine where I went with orange or pink petals with a dark maroon center. I used some unusual colors to show his feathers underneath his body in purple. His wings match some of the vine greens with the addition of turquoise in his flying feathers.
 This hummingbird on the right started out as a basic green feathered dude. I added dark blue for shadows then a red under his neck, adding the black outline and feathers for his beak, feathers, and eye outline. Finally, I put some random golden brown scattered across his whole body. I like the way that the flecks of golden brown kind of make it look like his body is shimmering. I think I will use this process in satin stitching in the future again. His flowers utilize the same color as the bird on the left but there is only one blossom on this side.
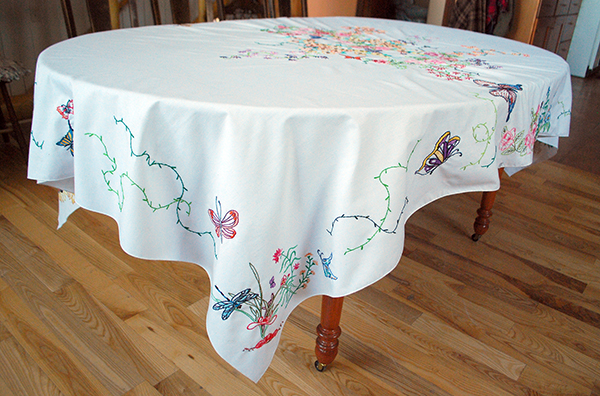
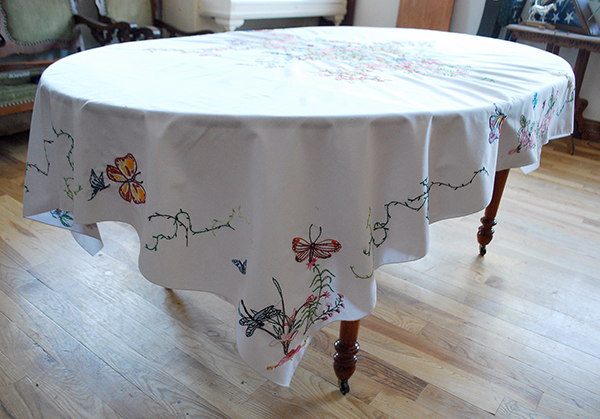
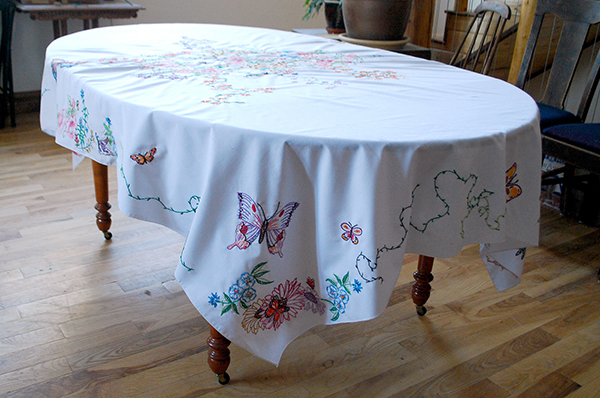
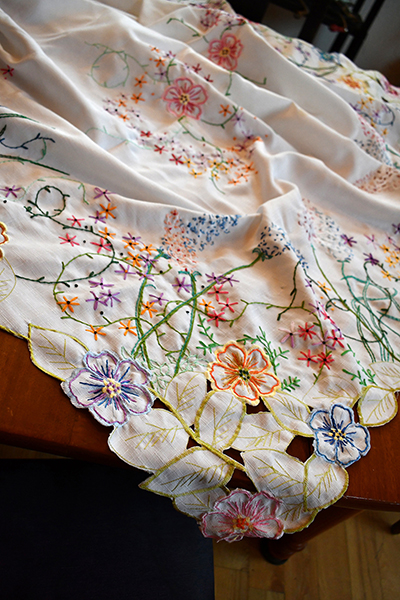 This Cutwork Flower Tablecloth was a discovery at a garage sale. It was sitting on a table full of miscellaneous craft materials. When I unfolded it, there were stains all over it. Would I be able to get them out? I could smell cigarette smoke and the stains were brown. The lady offered it to me for $2 so I thought, what the heck, why not.
 You can see that it was machine stitched (embroidered) in a simple flower pattern with leaves between the blossoms. I have already added a darker pink outline to the interior of the petals of this flower. The edge of the cloth and some of the areas between the leaves are cut out and edges are reinforced with stitching. This is called, “
 However, the machine stitching is just boring, so, I intend to “spiff it up” with some bright lines and satin stitching until I can say I love it. See the blue flower on the left where the original machine stitching pattern makes you feel like yawning? On the right is a yellow blossom that has had orange outlines added to the yellow blossom petals and red french knots added to the center. Okay, now we have some pizzazz going, and we are on a roll.
 I added embellishment all around the edge and then thought that the center of the tablecloth needed something more than the two little sets of a pair of pink blossoms. So I added some vines, and daisy’s in many colors. Yep, yep, yep.
 This idea spread to the corners and sides until I had all kinds of flowers and plants around the entire border of the tablecloth. That is what happens when you go weed in the garden and all of the flowers are blooming.
 Okay, a bit excessive but it was so much fun. It is a colorful addition to our tablecloth family.
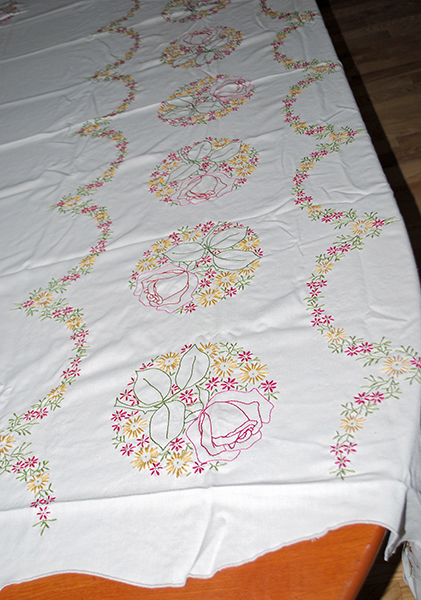 First Tablecloth
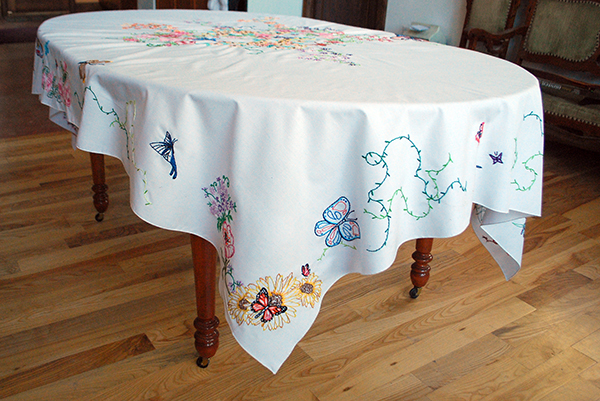
 You can see a row of flowers in a circular-shaped arrangement down the middle of the tablecloth that is bordered by curvy rows of daisies along each side. Each corner has the same rose that goes down the center. Spaced on the edges are a few rose buds with daisies. This took me a full year to finish, and there were many times when I thought I would never get it done. Doing a project like this teaches so much patience and perseverance. Believe me, it is quite an accomplishment to be able to finish this.
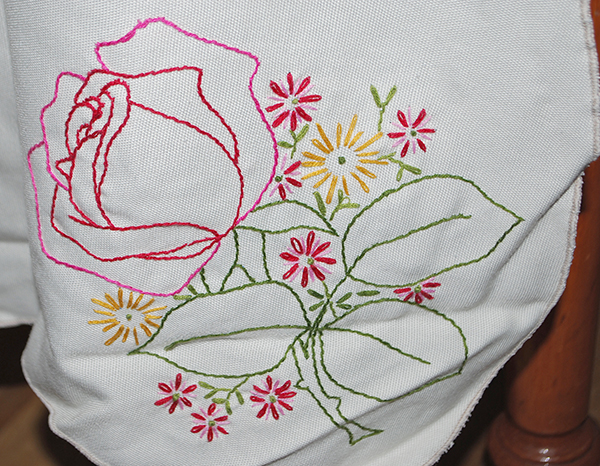 The more open rose bloom is a beautiful line drawing and the change in color from the darker red interior to the pink exterior is just classic. The leaves are expressive among the scattered daisies all around it. One of the difficult things to figure out was how to do the thorns on the rose stem. If the point is not done right, they curve instead of coming to a good point. Do you notice how many times the color of the embroidery floss changes?
 Here is the smaller budding rose and daisy arrangement that is spaced along the side edges. It was great to have a smaller area every once in a while. Whew. The stitches used in this one are outline, line, lazy daisy and french knots in many, many, many colors.
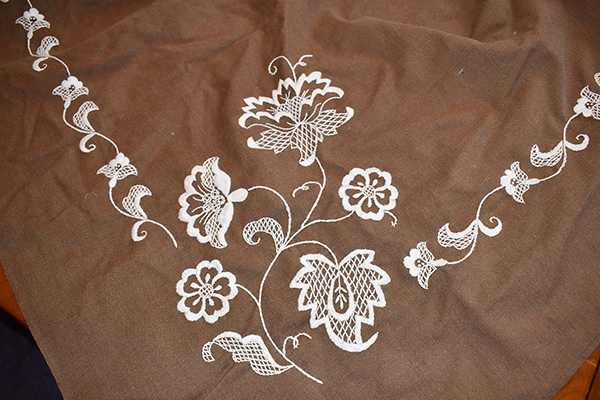 This is a simple brown & white tablecloth with off-white embroidery to embellish the edge and corners. The reason I chose this kit was, that I had just completed a tablecloth that had many different colored flosses throughout. I thought having only a single color would simplify and speed things up. I would not be stopping to change colors all the time. Ha, ha.
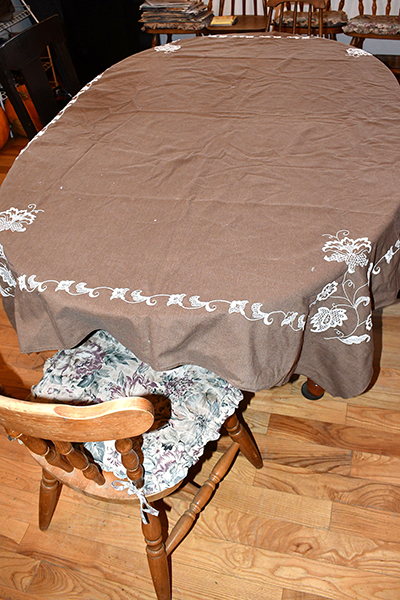 You can see that this table spread does only have embroidery on the edges and at each corner so the center of the table is plain. Consequently, I select this cloth whenever I want the food to be the star on a table or if I have a decorative doily or runner in the middle.
 What I failed to take into account was the complex type of stitches utilized in this particular pattern. There is a lot of satin stitch and curvey outline along with mucho chain stitch. The most difficult stitch for me on this tablecloth was the “fishnet”. The fishnet starts with laying down thread then tacking it down at all of the intersecting points. It is a bit tricky and took a while for me to get comfortable with it.
 All the edges of the tablecloth have a border of flower blossoms on curved stems with two leaves. The corners have a larger blossom arrangement with seven different shapes. Each blossom has 3 petals and a base filled with solid satin stitch. There are two lower petals in fishnet and outline stitches. There are 3 french knots inside of each flower. The curved stems connecting the flowers are done with a chain stitch. There are two leaves on the stem, one combines the fishnet with satin stitch, and the other is all satin stitch.
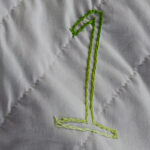


 It fit with the letters between the leaves and vine.
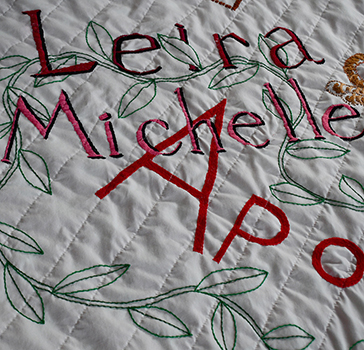 Here it is redone with the “i” and “e” changed around. Whew.
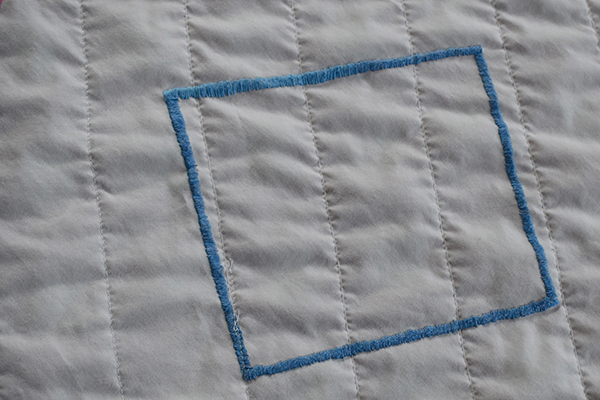 square,
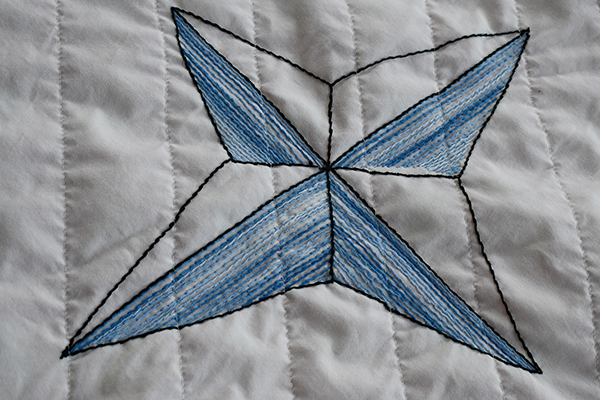 star,
star, sun,
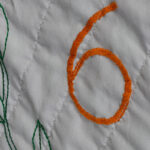
sun,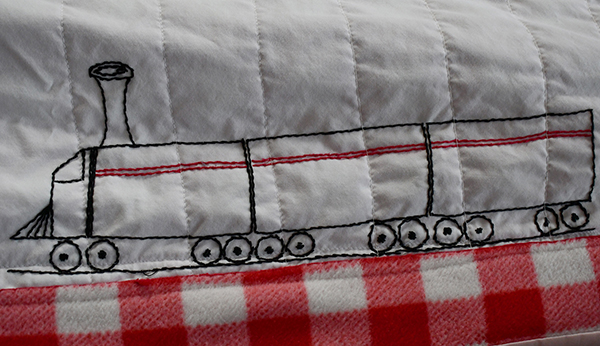 T is for train,
 triangle,
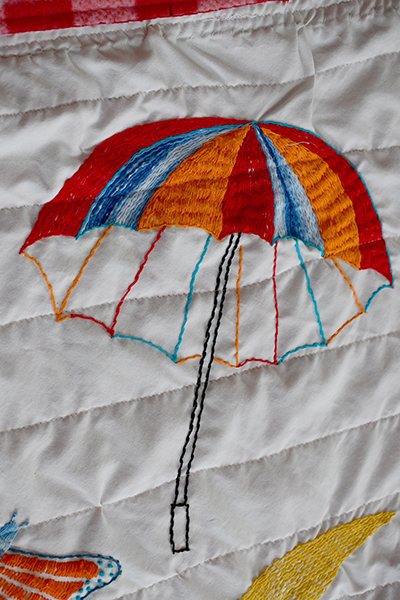 U is for umbrella,
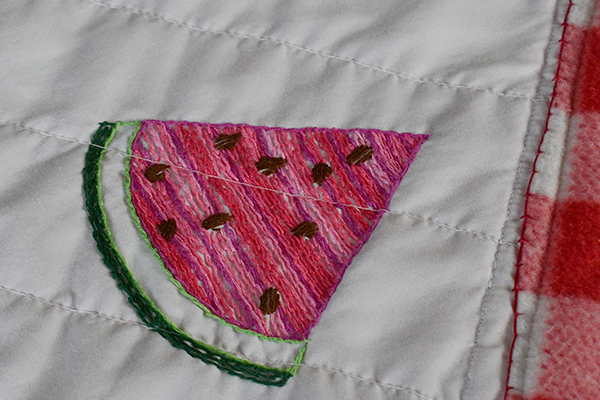 W is for watermelon.
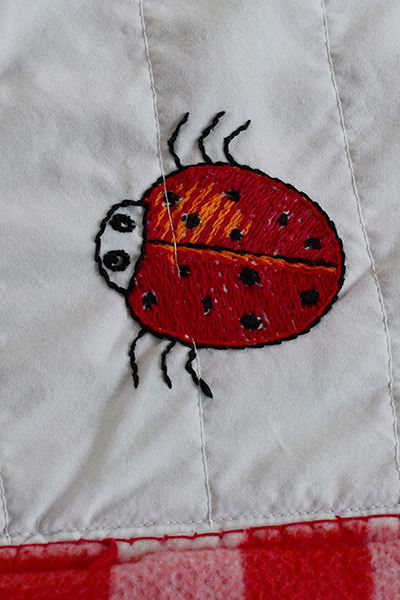 L is for ladybug,
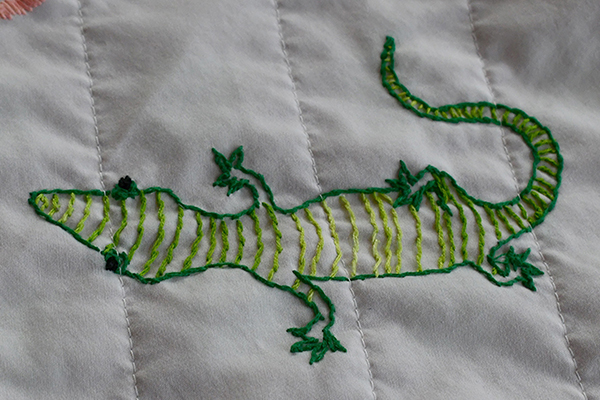 lizard,
 M is for moon,
 O is for octagon,
 octopus, orchid (already shown on the previous page),
 P is for puppy,
 R is for rectangle,
 S is for shamrock,

 and frog,
 H is for hand,
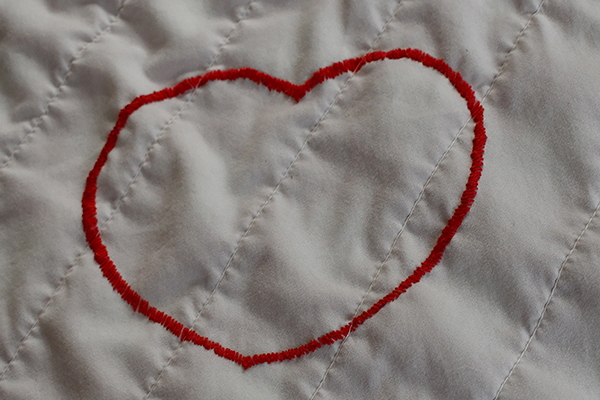 heart,
 hummingbird, (and orchid above it)
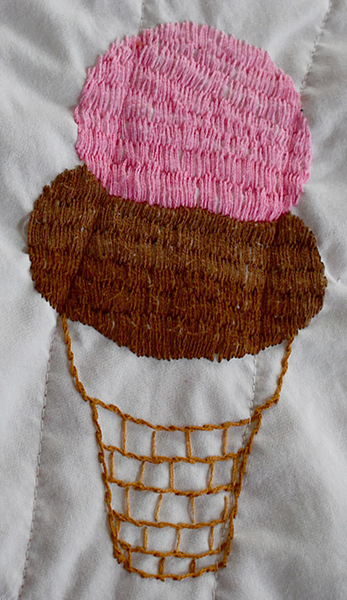 I is for ice cream,
 K is for kitten,
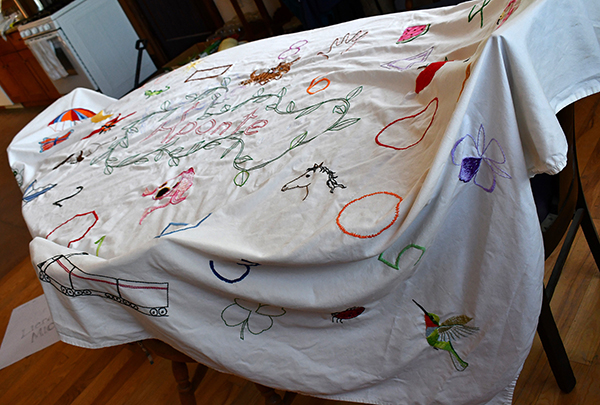
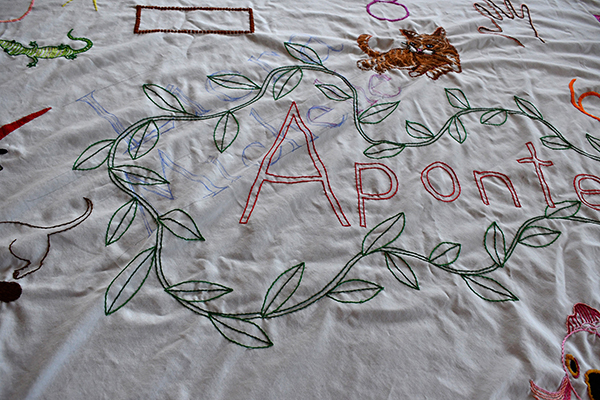
 Using an off-white sheet 54″ x 90″ I embroidered the family last name right in the middle and surrounded it with a twisting vine and leaves border. I planned to add the baby’s name later on. I purchased some red and white checkered flannel to use on the back with no batting. After completing this name located in the middle I then began drawing miscellaneous creatures, numbers, and shapes spaced across the blanket.
 airplane,
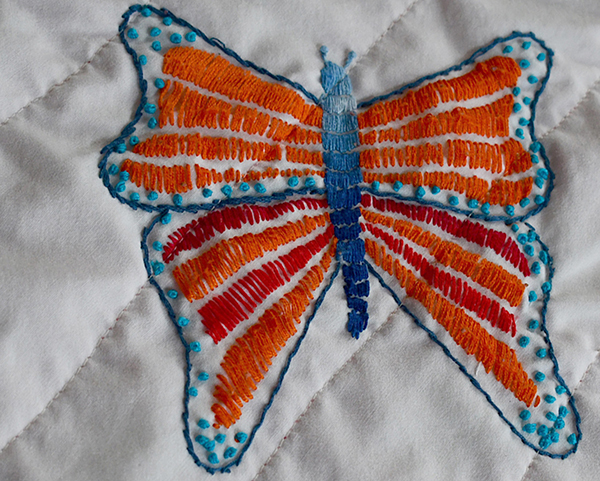 B is for butterfly,
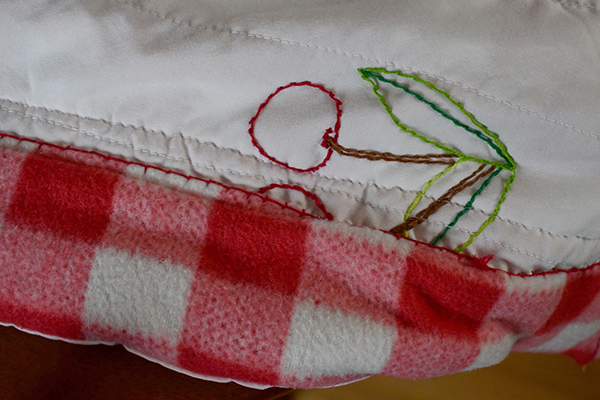 C is for cherry,
 circle,
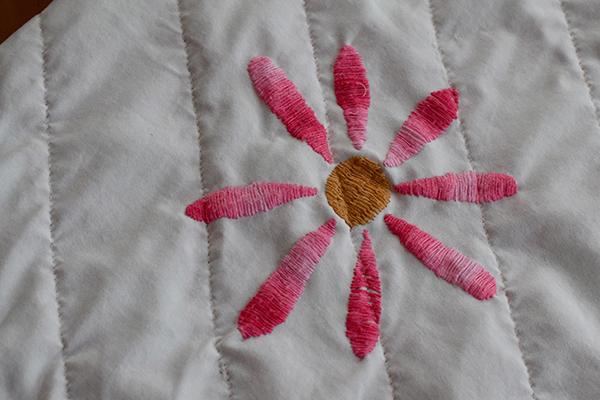 D is for daisy,
 At this stage of the embroidery on the 03 green hummingbird tutorial, my focus is on finishing the details and blending in or outlining shapes. I do that by adding touches of different colors to accentuate here and there. The addition of light blue edges to the wingtips and the tail feathers was a good start on wings and tail, but more is needed.
 Here is the finished hummingbird green hummingbird up close. Using a medium turquoise embroidery floss I outline above and below his eye and also along the top surface of his body. To mix stitches in with the satin stitch areas already complete I also run the stitches into existing satin areas randomly. Similarly, darker threads are added to both the orange under his neck and the green body below between his wing and tail. Turquoise is added as a thicker division line between his wing and tail feathers.
 We are continuing the embroidery on the pillowcase with a green hummingbird flying up to a vine full of honeysuckle blossoms. The honeysuckle vine leaves and vines are outlined in green and blossoms are satin stitched in orange. Now, I can direct my efforts back to finishing the hummingbird shading and texturing.
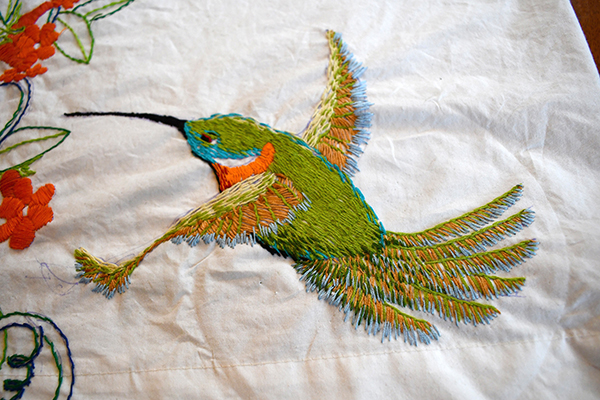 In this picture, you can see that I am in the process of adding a cool blue shadow to the wing and tail feathers right now. His long black beak is satin stitched along with his eye. A black outline follows the belly line from under his chin to his tail. A loose satin stitch pattern in a mustard brown fills between his feathers in both his wings and his tail. I have added random stitches of medium green in the neon yellow of the leading edge of his wings for more texture.
 Looking back at the honeysuckle vine there is not enough definition between the tubes of the blossoms and the petals. Those surfaces are blending together and getting lost as I look at them. So, a darker red is satin stitched intermittently into the bottom surface of the tubes to help show a shadow shape and separate from the petals above. Also, a darker red outline is stitched along the dark side edges of each petal.
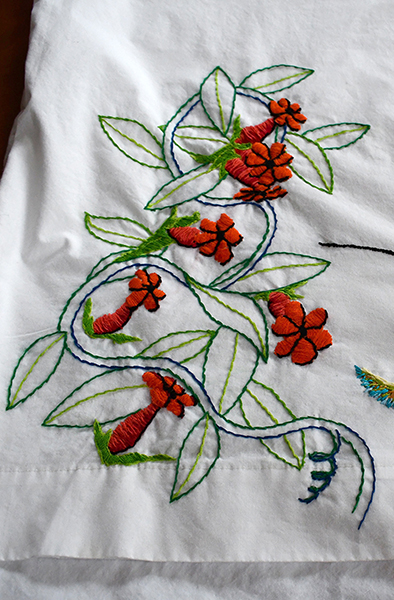 After darkening the edges of the petals, looking at them again, it still feels like it needs more. So, I use black to fill the center of the blossom petals and outline the shadow of the petal. Now I can see the shape and different layers of the honeysuckle blossoms at a glance.
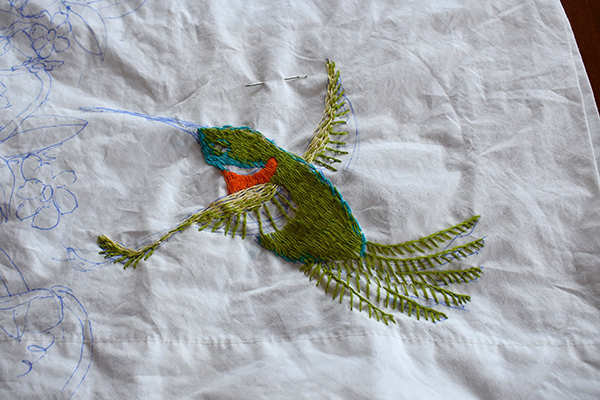 A white pillowcase embroidery tutorial with a 01 green hummingbird flying up to a vine full of honeysuckle blossoms. We are viewing the hummingbird from slightly above on the side. I drew the hummingbird sketch and honeysuckle vine loosely not trying to be exact. Be careful about what you choose to use to make your lines for patterns with. Unfortunately, even though the package instructions said they would. I have had some products from the sewing store that did not wash out or iron off. Disappointing to say the least.
 The main body of the bird is satin stitched in a medium green and his wing tops are light almost neon green. He has an orange patch under the neck with a little white area to catch your eye. Further, the wing feathers are suggested with lines using a darker medium green.
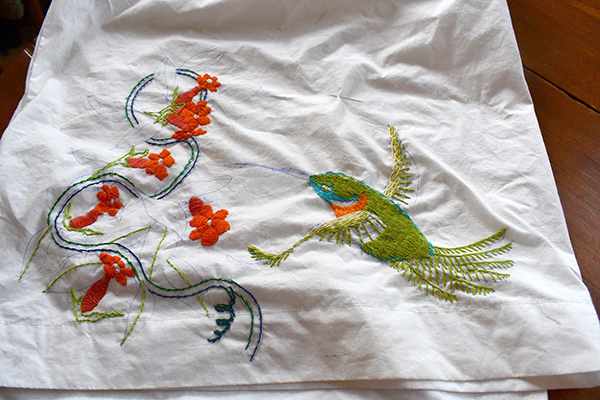 The vines are outlined using two different greens, a medium where the light hits the surfaces and a blue-green where shadow resides. The middle line of the leaves and foliage holding the blossoms are all done in the lighter neon green.

 You may have noticed that there are many different colored flowers.
 There are multiple random vines drawn in with leaves and “tear-drop” stitch flowers scattered everywhere. The vines and little flowers are what connect all the characters and foliage together along the edges and across the middle.
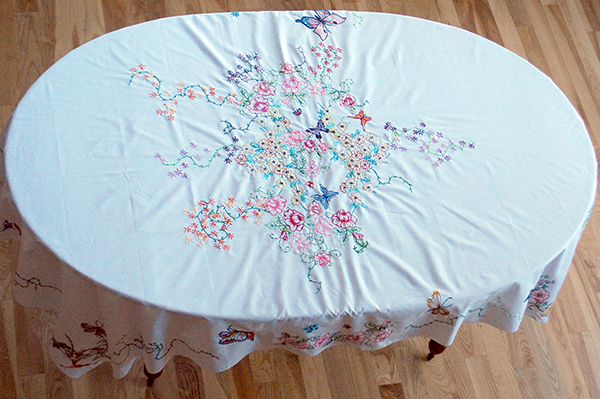
 A Hummingbird Pillowcase with embroidery halfway done. This is a handmade dark blue pillowcase that is sewn from sheets purchased when they are on sale. I first draw out an outline to follow for embroidering the hummingbird as it flies over some small flowers which I decide to make with yellow satin stitches with an orange outline. The leaves and stems are light green. After getting this portion done, I feel like it is not enough.
 So, I use my iron-away pens to draw another set of pink flowers for the hummingbird to be going after. Here it is completed with the hummingbird and flowers on bothe sides. I love drawing these little guys and then stitching them into life with my embroidery thread in the evenings. This one is being given to a very special lady for her birthday.

