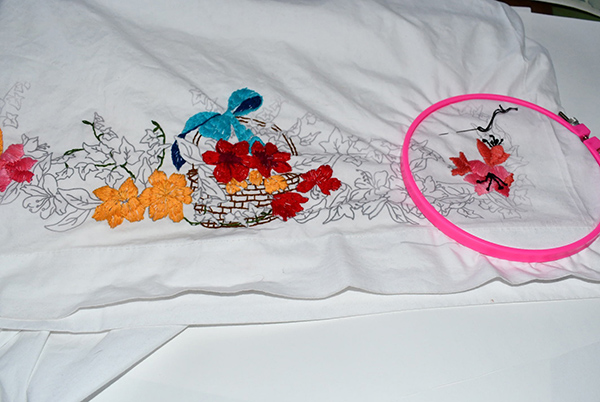
 Embroidering a new pillow case in the evenings. It is a “Flower Basket” pattern from one of my many iron-on patterns purchased over the years from (Aunt Martha’s). I love the way this one has a little ribbon tied to the basket handle.
 Really, I don’t know what kind of flower is portrayed in this design. Not taking the time to research it, I am using any color that I feel like for the flowers. If you do know what kind of flower this is, please let me know. In the flower petals, there will be lots and lots of satin stitches happening.
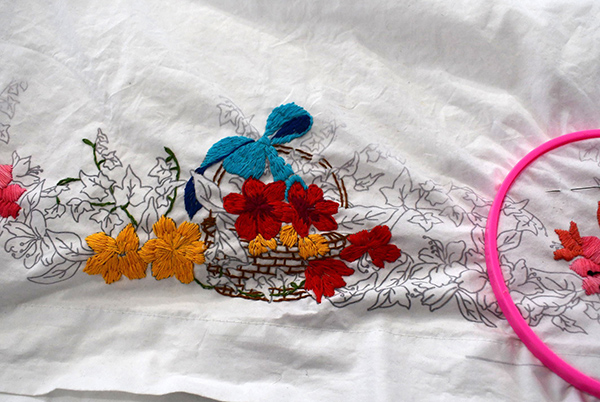
 Now, you can see some of the gold flowers have the stamen (anther & filament) done in black lines and french knots, coming out of the middle of the flower.
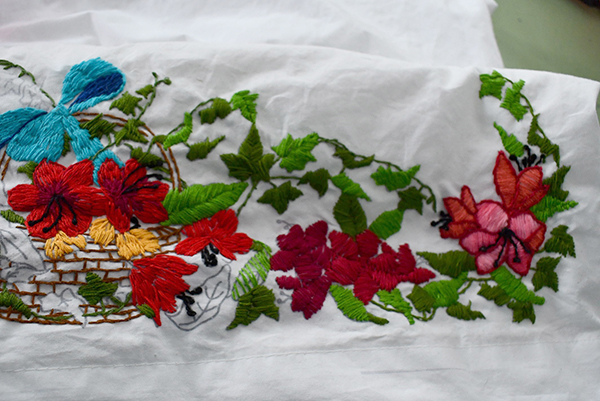 I am using all kinds of different greens on the leaves and vines and a good mixture of reds, yellows, and pinks on all the flowers. This is the most enjoyable way for me to paint with thread, just do whatever I feel like. How about pink? Nah, Yellow-orange, yeah that fits right here.
 You can see that the ribbon is one of my favorite blues, I have a lot of shirts in this color. We all know it takes some time to finish one of these pillowcases. But, embroidery is a lot of fun for my hands in the evening. A repetitious movement calms me as I take one stitch after the other. I almost can feel the presence of my Mom, Grandma, and Great Grandma in the room sometimes. We enjoyed sitting in the living room doing our crafts together and visiting as we listened to music.
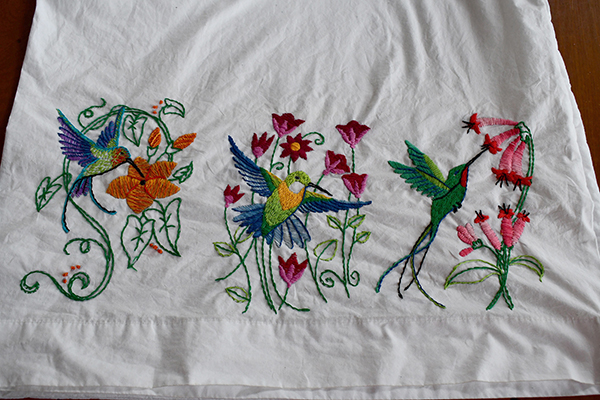 Here are the gradual steps that are taken to finish this pillowcase with 3 hummingbird iron-on patterns. Three different arrangements of birds, flowers, and foliage across this single bed linen.
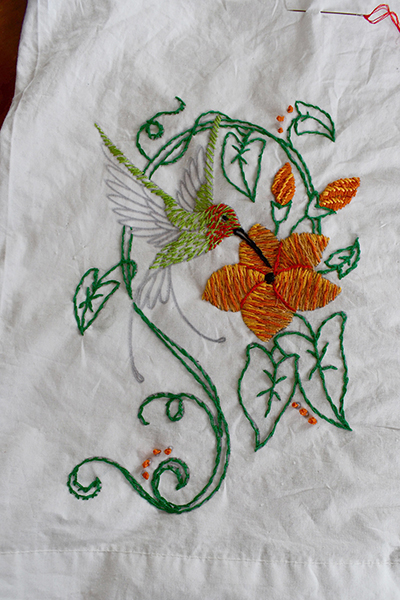
 Black lines emphasize the underside of his body shape, his beak and eye, and the individual feathers. Then turquoise blue is used to outline his upper body shape and wing tops.
 This hummingbird flying toward us is showing his underside to us with flowers behind. His wings and tail feathers begin in blue stitching.
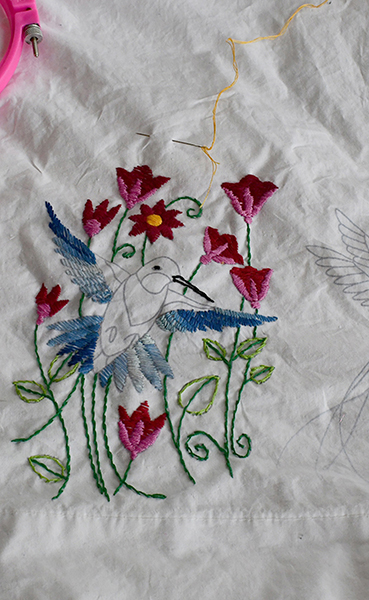 He is satin stitched in greens on his body and the wing tops along with a light amount of yellow highlight. His chest is a brilliant yellow and the underside of his throat is left white. Dark royal blue is used to outline the feathers on his outstretched wings.
 This pillow has 3 hummers (hummingbirds) on it from
 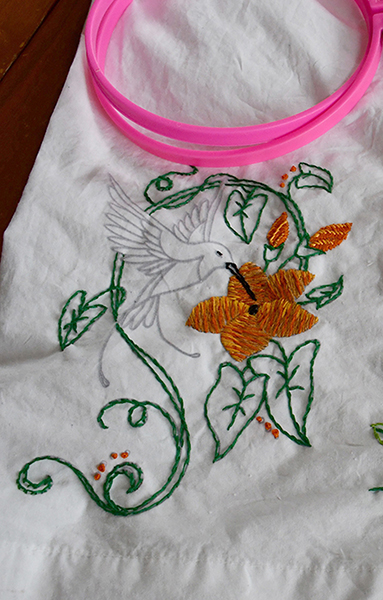 Close up of a humming flying toward us showing his underside is in the middle with some maroon and purple/pink petal flowers in the background. I have only started to stitch the underside of this bird’s wings and tail feathers in blues.
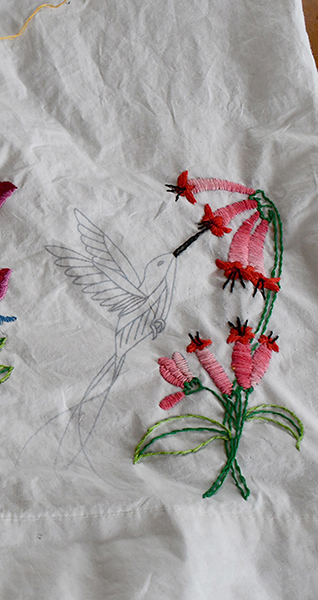
 Just finished embroidering a white Pillowcase Two H Birds. Usually, I draw my own pattern but these two hummingbirds are from an iron-on pattern by
 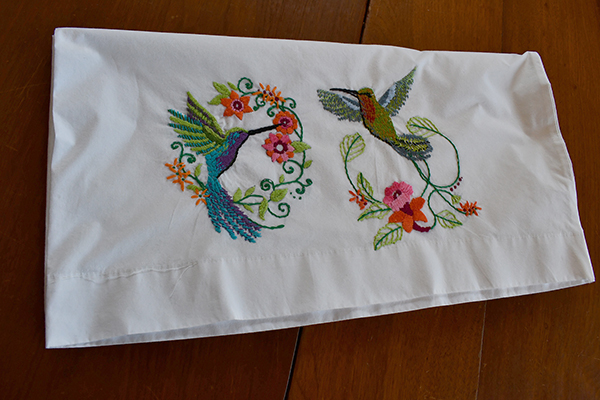 Here is the pillowcase all washed, ironed, and folded on the dining room table. I really took the easy way out on this, with the pattern and also failing to take pictures as the project gradually progressed. You’ll have to use your imagination.
 This hummer on the left side has his beak inserted into the middle flower on the vine where I went with orange or pink petals with a dark maroon center. I used some unusual colors to show his feathers underneath his body in purple. His wings match some of the vine greens with the addition of turquoise in his flying feathers.
 This hummingbird on the right started out as a basic green feathered dude. I added dark blue for shadows then a red under his neck, adding the black outline and feathers for his beak, feathers, and eye outline. Finally, I put some random golden brown scattered across his whole body. I like the way that the flecks of golden brown kind of make it look like his body is shimmering. I think I will use this process in satin stitching in the future again. His flowers utilize the same color as the bird on the left but there is only one blossom on this side.
 At this stage of the embroidery on the 03 green hummingbird tutorial, my focus is on finishing the details and blending in or outlining shapes. I do that by adding touches of different colors to accentuate here and there. The addition of light blue edges to the wingtips and the tail feathers was a good start on wings and tail, but more is needed.
 Here is the finished hummingbird green hummingbird up close. Using a medium turquoise embroidery floss I outline above and below his eye and also along the top surface of his body. To mix stitches in with the satin stitch areas already complete I also run the stitches into existing satin areas randomly. Similarly, darker threads are added to both the orange under his neck and the green body below between his wing and tail. Turquoise is added as a thicker division line between his wing and tail feathers.
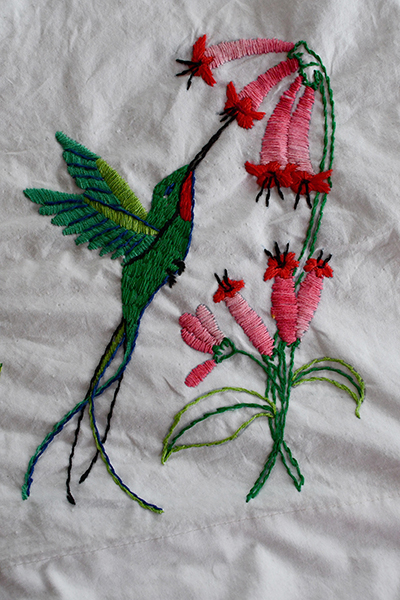
 We are continuing the embroidery on the pillowcase with a green hummingbird flying up to a vine full of honeysuckle blossoms. The honeysuckle vine leaves and vines are outlined in green and blossoms are satin stitched in orange. Now, I can direct my efforts back to finishing the hummingbird shading and texturing.
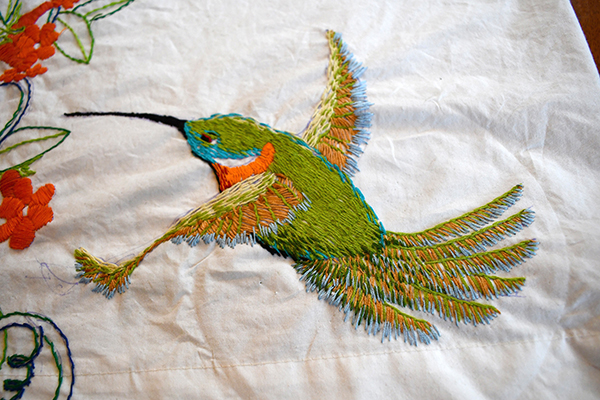 In this picture, you can see that I am in the process of adding a cool blue shadow to the wing and tail feathers right now. His long black beak is satin stitched along with his eye. A black outline follows the belly line from under his chin to his tail. A loose satin stitch pattern in a mustard brown fills between his feathers in both his wings and his tail. I have added random stitches of medium green in the neon yellow of the leading edge of his wings for more texture.
 Looking back at the honeysuckle vine there is not enough definition between the tubes of the blossoms and the petals. Those surfaces are blending together and getting lost as I look at them. So, a darker red is satin stitched intermittently into the bottom surface of the tubes to help show a shadow shape and separate from the petals above. Also, a darker red outline is stitched along the dark side edges of each petal.
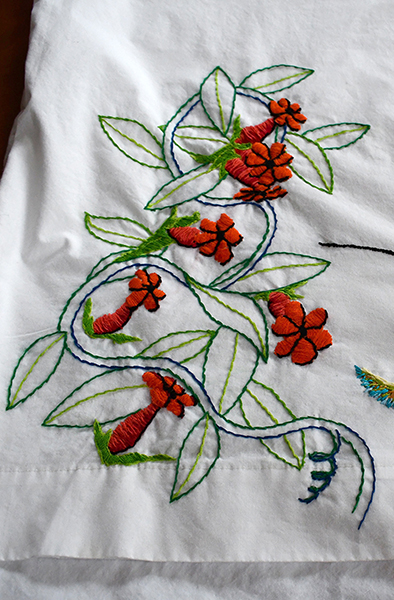 After darkening the edges of the petals, looking at them again, it still feels like it needs more. So, I use black to fill the center of the blossom petals and outline the shadow of the petal. Now I can see the shape and different layers of the honeysuckle blossoms at a glance.
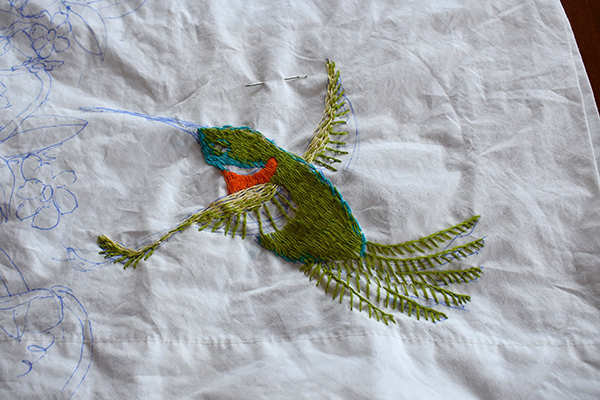 A white pillowcase embroidery tutorial with a 01 green hummingbird flying up to a vine full of honeysuckle blossoms. We are viewing the hummingbird from slightly above on the side. I drew the hummingbird sketch and honeysuckle vine loosely not trying to be exact. Be careful about what you choose to use to make your lines for patterns with. Unfortunately, even though the package instructions said they would. I have had some products from the sewing store that did not wash out or iron off. Disappointing to say the least.
 The main body of the bird is satin stitched in a medium green and his wing tops are light almost neon green. He has an orange patch under the neck with a little white area to catch your eye. Further, the wing feathers are suggested with lines using a darker medium green.
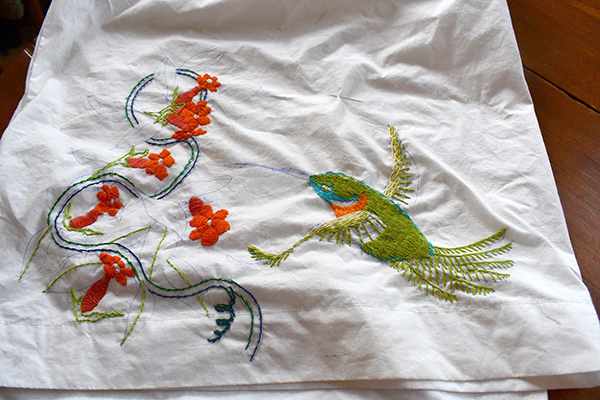 The vines are outlined using two different greens, a medium where the light hits the surfaces and a blue-green where shadow resides. The middle line of the leaves and foliage holding the blossoms are all done in the lighter neon green.
 A Hummingbird Pillowcase with embroidery halfway done. This is a handmade dark blue pillowcase that is sewn from sheets purchased when they are on sale. I first draw out an outline to follow for embroidering the hummingbird as it flies over some small flowers which I decide to make with yellow satin stitches with an orange outline. The leaves and stems are light green. After getting this portion done, I feel like it is not enough.
 So, I use my iron-away pens to draw another set of pink flowers for the hummingbird to be going after. Here it is completed with the hummingbird and flowers on bothe sides. I love drawing these little guys and then stitching them into life with my embroidery thread in the evenings. This one is being given to a very special lady for her birthday.
